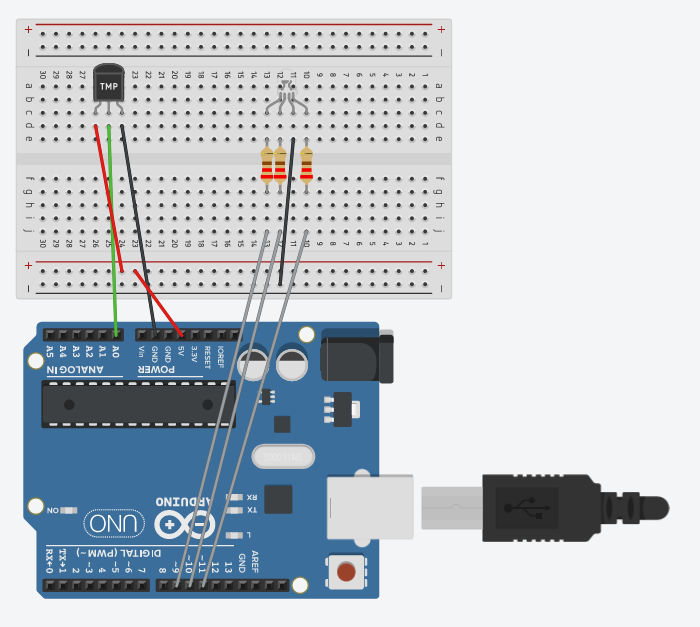
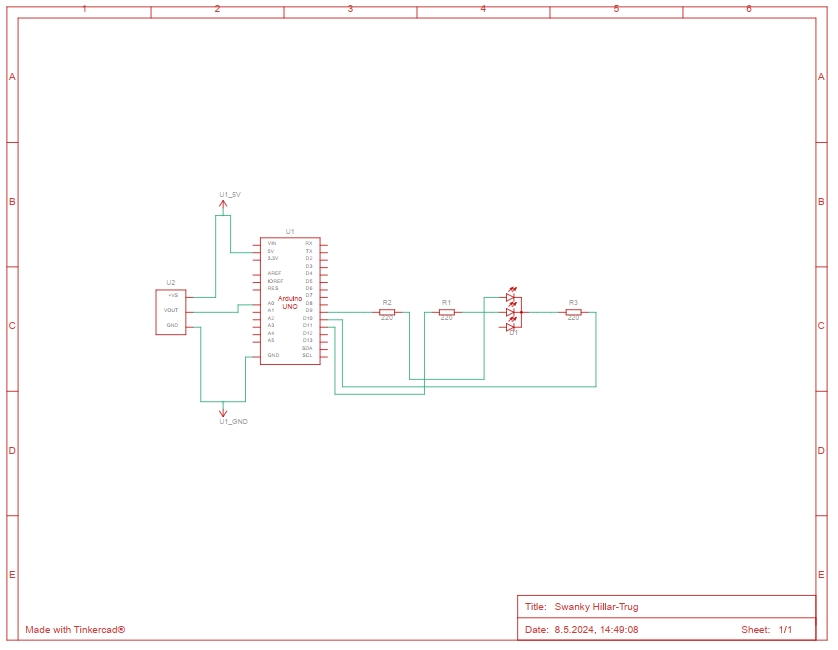
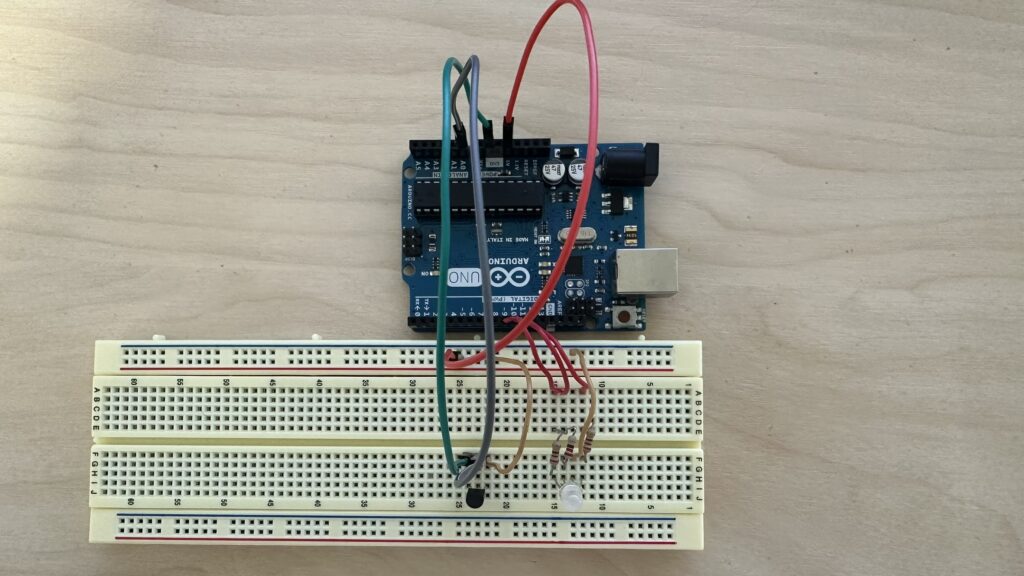
Temperature sensor
This code is used to control an LED light that changes color based on the temperature read by a sensor. It uses functions to set up pins, read sensor data, convert it to temperature, and adjust LED colors

// Define pin numbers for the red, green, and blue
const int RED_PIN = 11;
const int GREEN_PIN = 9;
const int BLUE_PIN = 10;
// Define the voltage and the maximum value
const float VOLTAGE = 5.0;
const int RESOLUTION = 1023;

void setup() {
  // Set A0 as input for the temperature sensor
  pinMode(A0, INPUT);
  pinMode(RED_PIN, OUTPUT);
  pinMode(GREEN_PIN, OUTPUT);
  pinMode(BLUE_PIN, OUTPUT);
  Serial.begin(9600); // 9600 bits per second
}

void loop() {
  // Variable to store temperature in Celsius
  float tempC;
  // Read the analog value from sensor
  int sensor = analogRead(A0);
  float voltage = (sensor / (float)RESOLUTION) * VOLTAGE;
  // Convert voltage to temperature in Celsius
  tempC = (voltage - 0.5) * 100.0;
  // Sends the temperature value and goes to new line
  Serial.print("Temp: ");
  Serial.println(tempC);

  // Check the temperature and change LED color
  if (tempC <= 0) {
    setColor(0, 0, 255); // Blue
  } else if (tempC > 0 && tempC <= 20) {
    setColor(255, 255, 0); // Yellow
  } else {
    setColor(255, 255, 255); // White
  }
}

// Function to set the color of the LED
void setColor(int red, int green, int blue) {
  analogWrite(RED_PIN, red);
  analogWrite(GREEN_PIN, green);
  analogWrite(BLUE_PIN, blue);
}

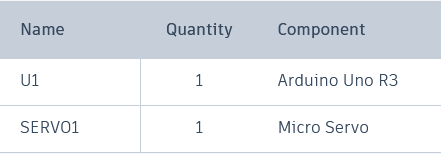
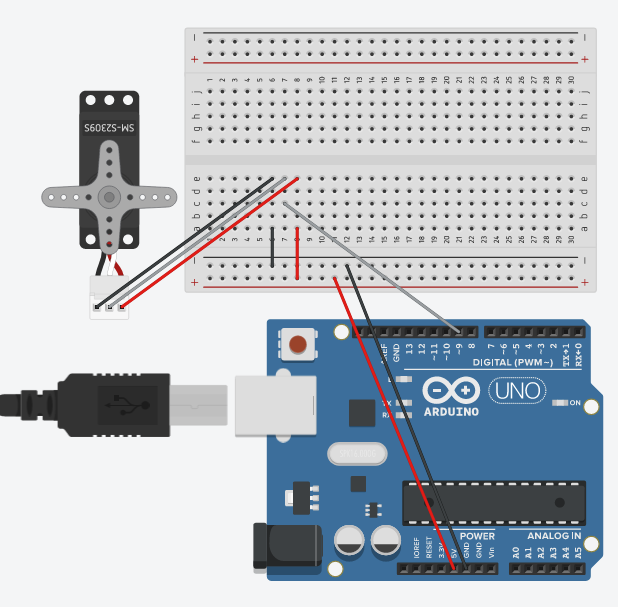
Servo motor
// Include the Servo library to control servo motors
#include  <Servo.h>
// Create a servo object to control a servo
Servo servo1;

void setup()
{
  // Attach the servo motor (pin 9)
  servo1.attach(9);
}
void loop()
{
  // Variable to store the servo position
  int position;

  // Set servo to 90 degrees
  servo1.write(90);  // Turn to 90 degrees
  delay(1000); // Wait for 1 second
  // Set servo to 180 degrees
  servo1.write(180);  // Turn  to 180 degrees
  delay(1000);
  // Set servo to 0 degrees
  servo1.write(0); // Turn to 0 degrees
  delay(1000);

  // Gradually move the servo from 0 to 180 degrees
  for(position = 0; position < 180; position += 2)
  {
    // Move to the next position
    servo1.write(position);
    // Short delay to see the movement
    delay(20);
  }
  // Gradually move the servo from 180 back to 0 degrees
  for(position = 180; position >= 0; position -= 1)
  {
    // Move to the previous position
    servo1.write(position);
    delay(20);
  }
}
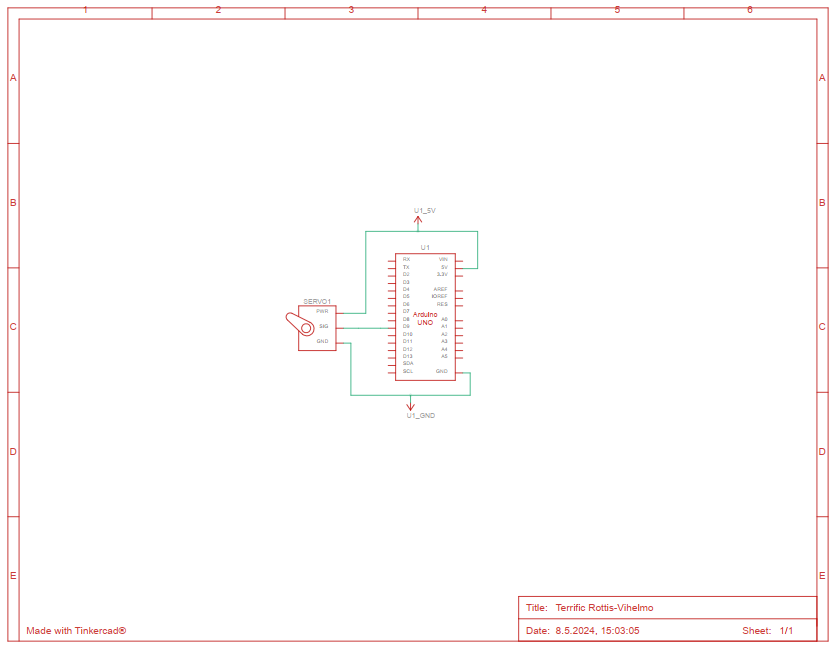
This program controls a servo motor, making it move to different positions. A servo motor can rotate to specific angles. The code includes setting the servo to fixed angles and moving it smoothly between angles.
- Setup function: Initializes the servo on pin 9.
- Loop function: Repeatedly moves the servo to 90 degrees, 180 degrees, and back to 0 degrees. After that, it smoothly increases the angle from 0 to 180 degrees and then smoothly decreases back to 0 degrees. Each position change has a short delay so the movement can be observed.
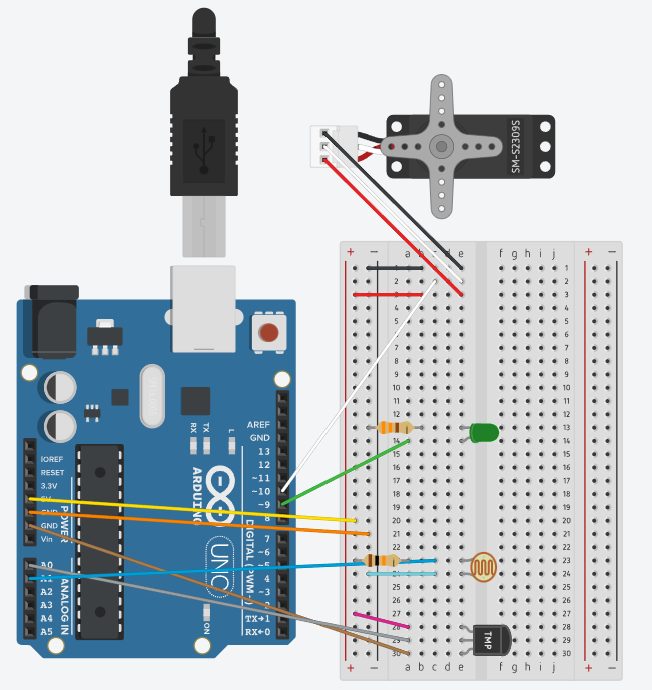
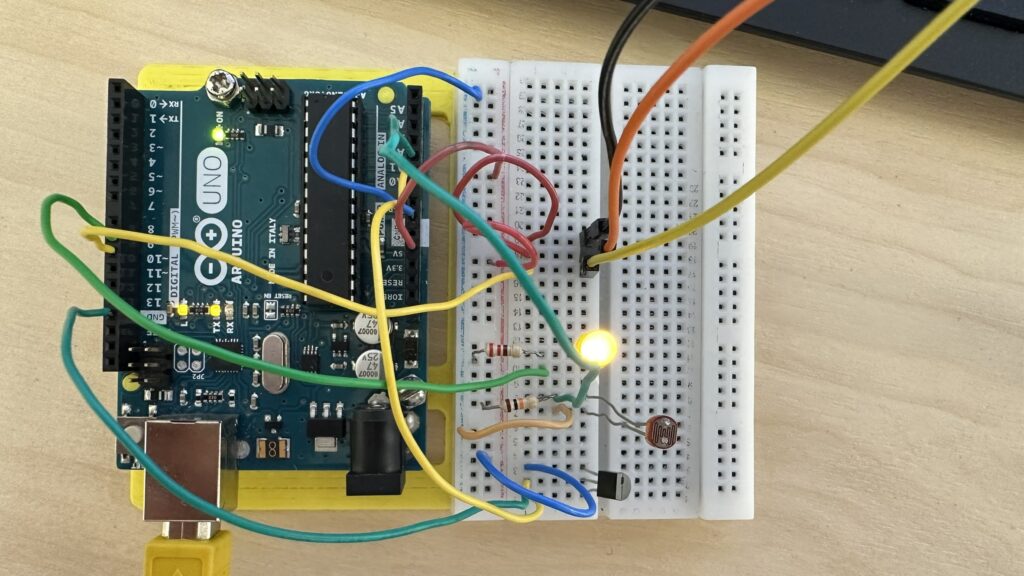
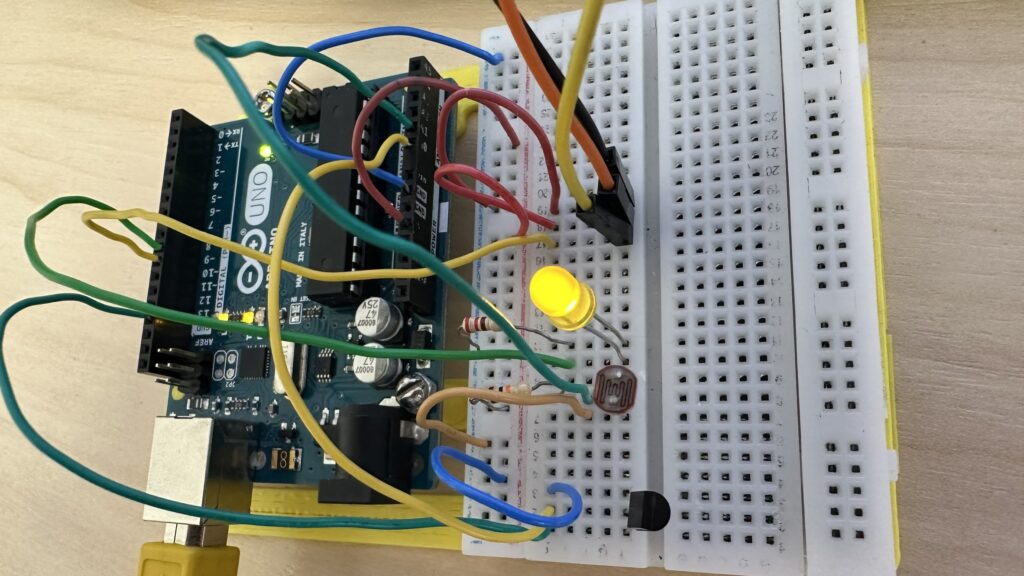
Automated greenhouse
This code helps control the environment inside a greenhouse by using a motor to open or close something based on the temperature and using a light to help plants when it’s too dark.
#include <Servo.h>

Servo servo1;
const int tempPin = A0;
const int lightPin = A1;
const int ledPin = 9;

void setup() {
  servo1.attach(10);
  pinMode(ledPin, OUTPUT);
  Serial.begin(9600);
}

void loop() {
  int temp_pin = analogRead(tempPin);
  int light_pin = analogRead(lightPin);

  float voltage = (temp_pin / 1023.0) * 5.0;
  float temperature = (voltage - 0.5) * 100.0;

  int servoPosition = map(temperature, 22, 35, 0, 180);
  servoPosition = constrain(servoPosition, 0, 180);

  int curPosition = servo1.read();
  if (curPosition < servoPosition) {
    for (int pos = curPosition; pos < servoPosition; pos++) {
      servo1.write(pos);
      delay(20);
    }
  } else if (curPosition > servoPosition) {
    for (int pos = curPosition; pos > servoPosition; pos--) {
      servo1.write(pos);
      delay(20);
    }
  }

  if (light_pin < 512) {
    digitalWrite(ledPin, HIGH);
  } else {
    digitalWrite(ledPin, LOW);
  }

  Serial.print("Temperature (C): ");
  Serial.println(temperature);
  Serial.print("Light level: ");
  Serial.println(light_pin);
  Serial.print("Servo position: ");
  Serial.println(servoPosition);

  delay(1000);
}

- Include the Servo library: allows to control the servo motor.
- Create Servo object: a servo motor named ‘servo1’.
- Define pins: are used for the temperature sensor, light sensor, and the LED light.
- Setup function:
- Attach servo: connect servo motor to pin number (in this example 10)
- Set LED pin: pin number 9 will be used for turning the LED light on and off
- Set up a way (
Serial)
- Loop function:
- Read sensors:
temp_pin: wr read the temperature from the sensor and figure out how hot or cold it is.light_pin: check how much light there is with another sensor.
Voltageandtemperature: calculate temperature in Celsius- Move servo motor:
servoPosition: find position for servo. Based on the temperature, we decide where to move the servo. If it’s cold (22 degrees Celsius), the servo moves to position 0. If it’s hot (35 degrees Celsius), the servo moves to position 180.- Smooth movement: We move the servo slowly to the new position. If it needs to go to a higher number, it moves up step by step. If it needs to go lower, it moves down step by step.
- Control the LED light:
- When it’s dark: If there is not much light, we turn the LED on.
- When it’s light: If there is enough light, we turn the LED off.
- Send info to the computer:
- We send the temperature, how much light there is, and where the servo is
- Wait a second: After doing all this, we wait for one second and then do it again.
- Read sensors: