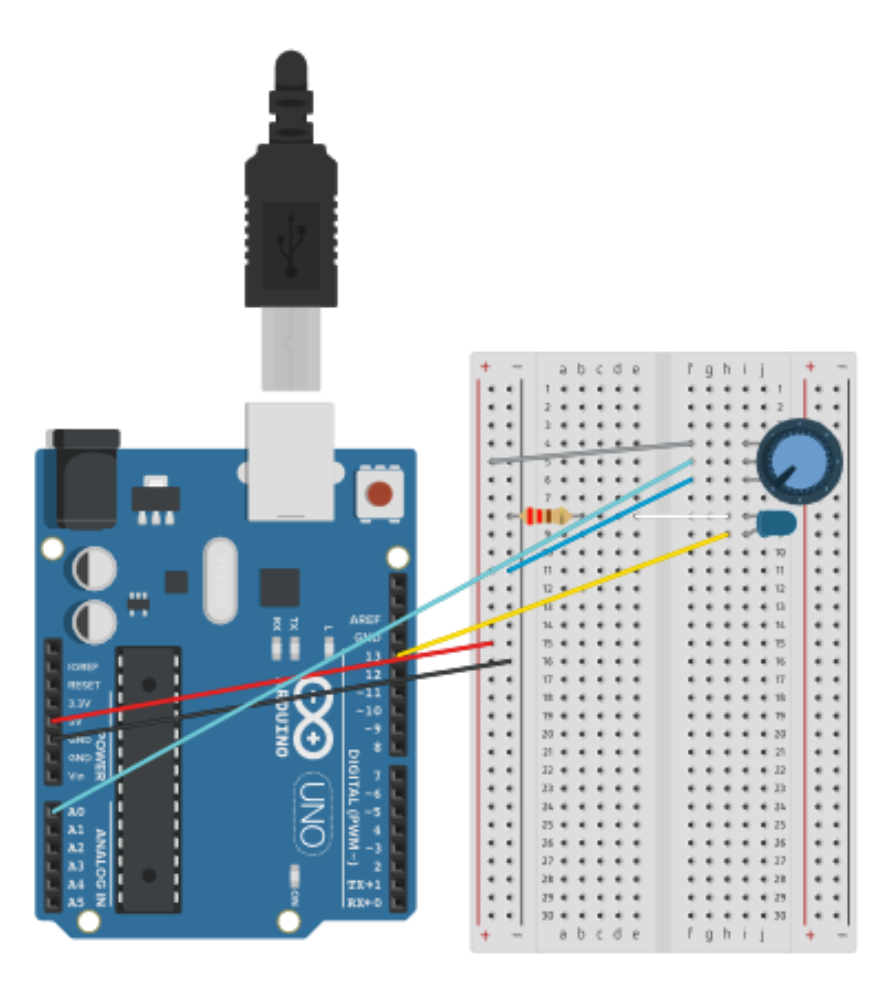
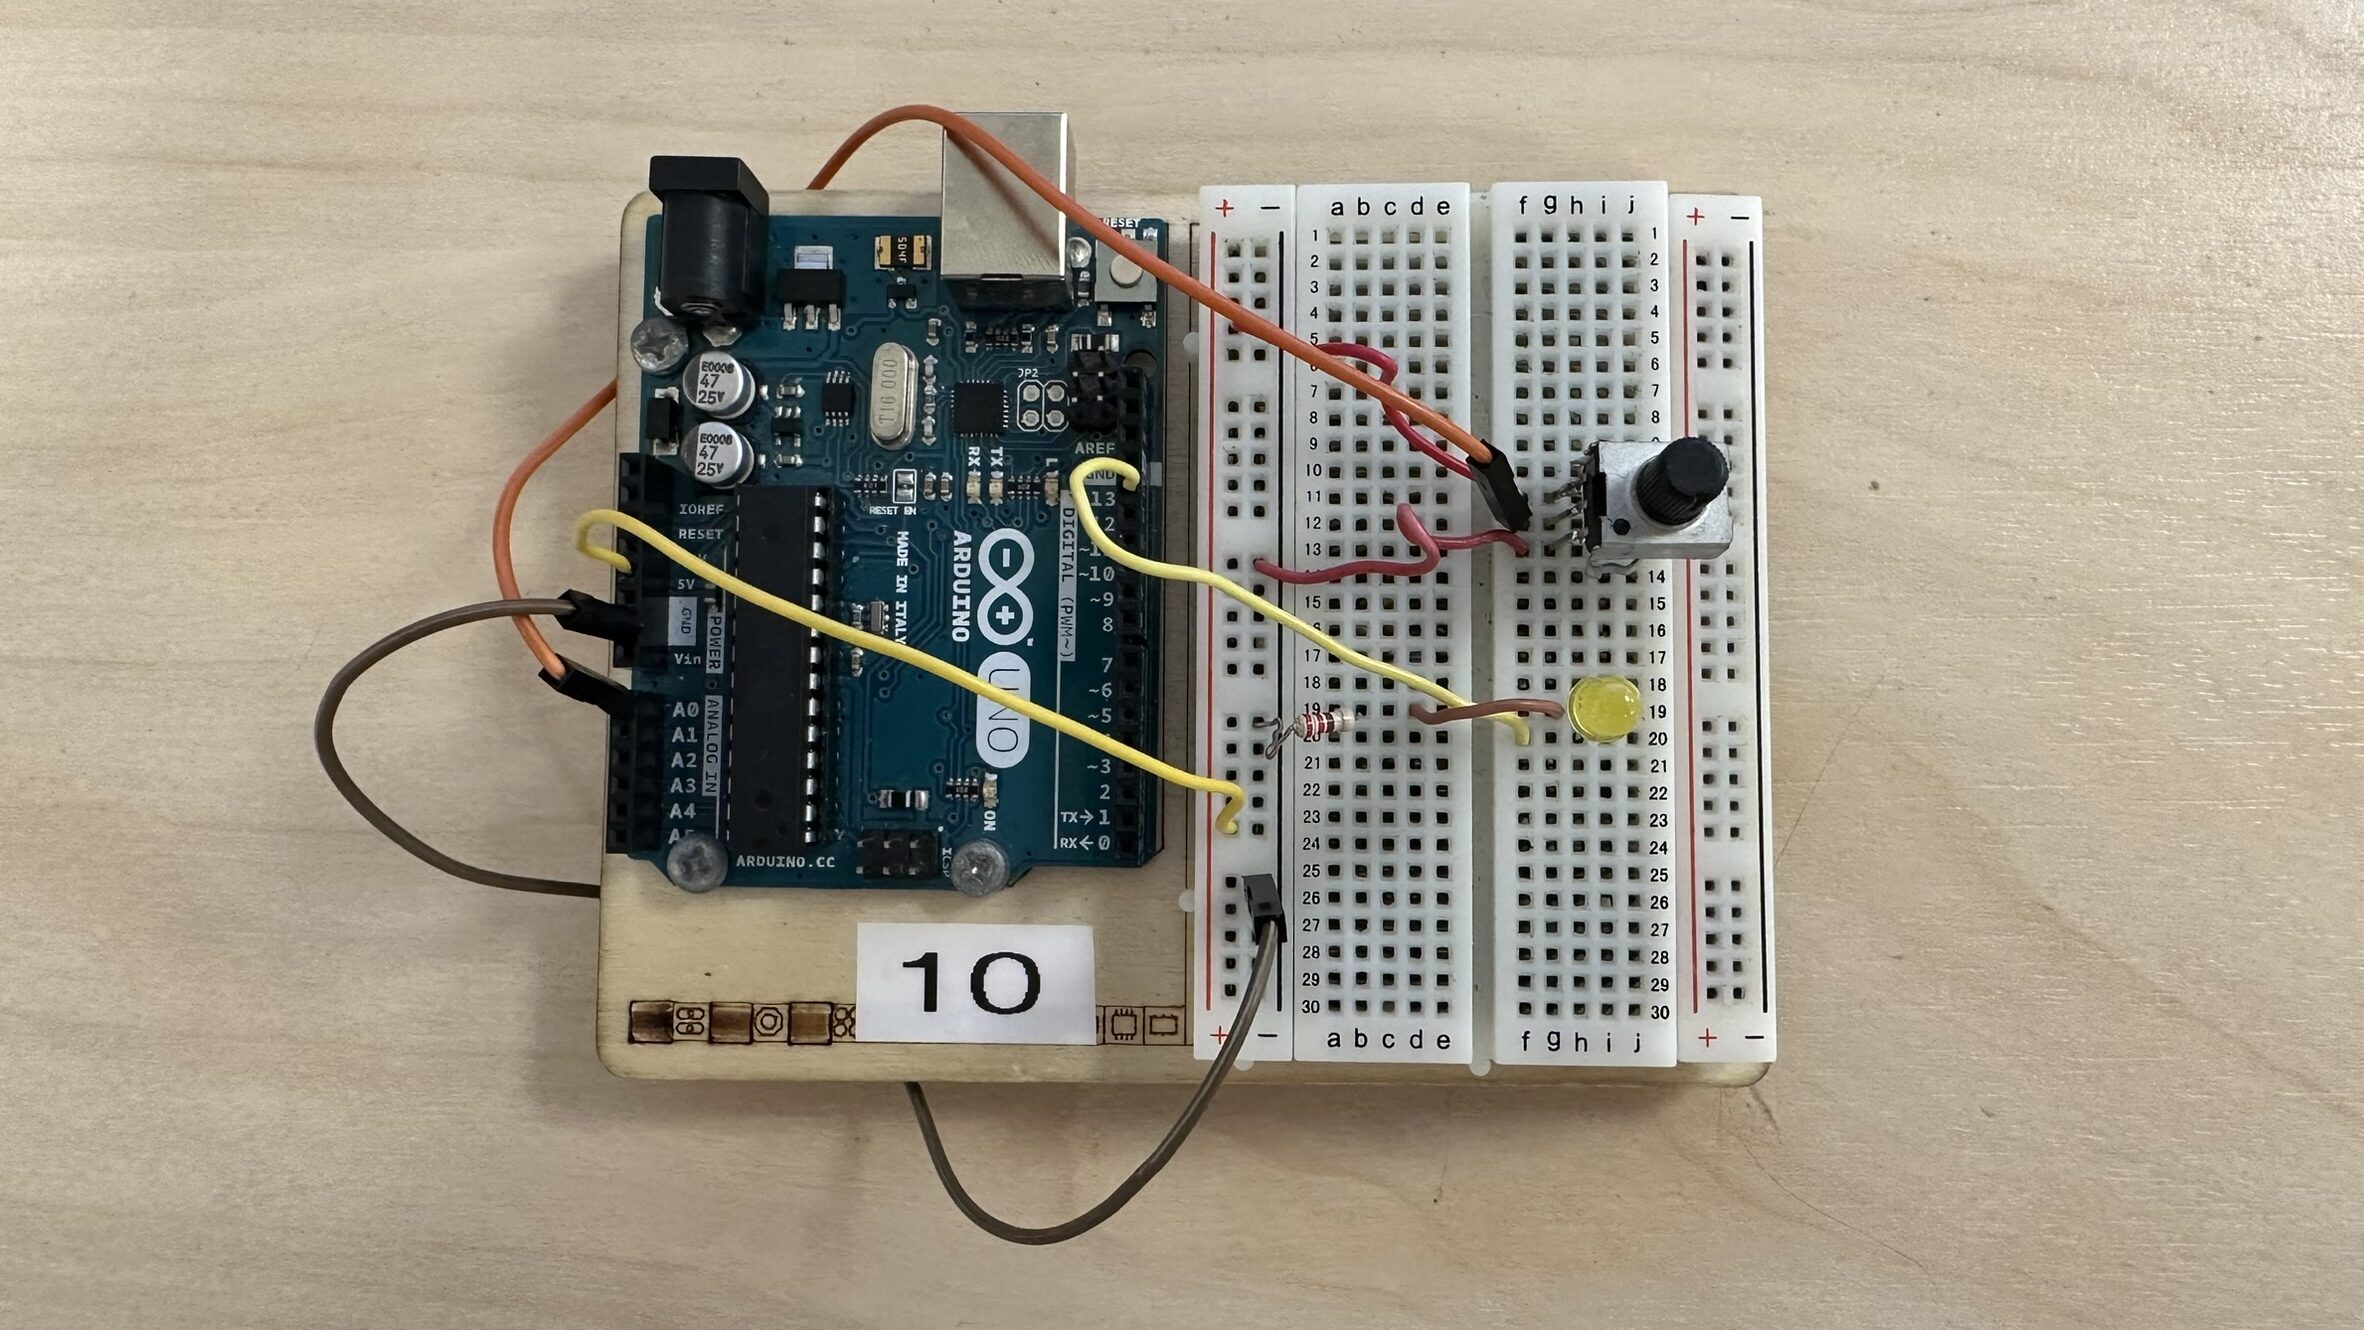
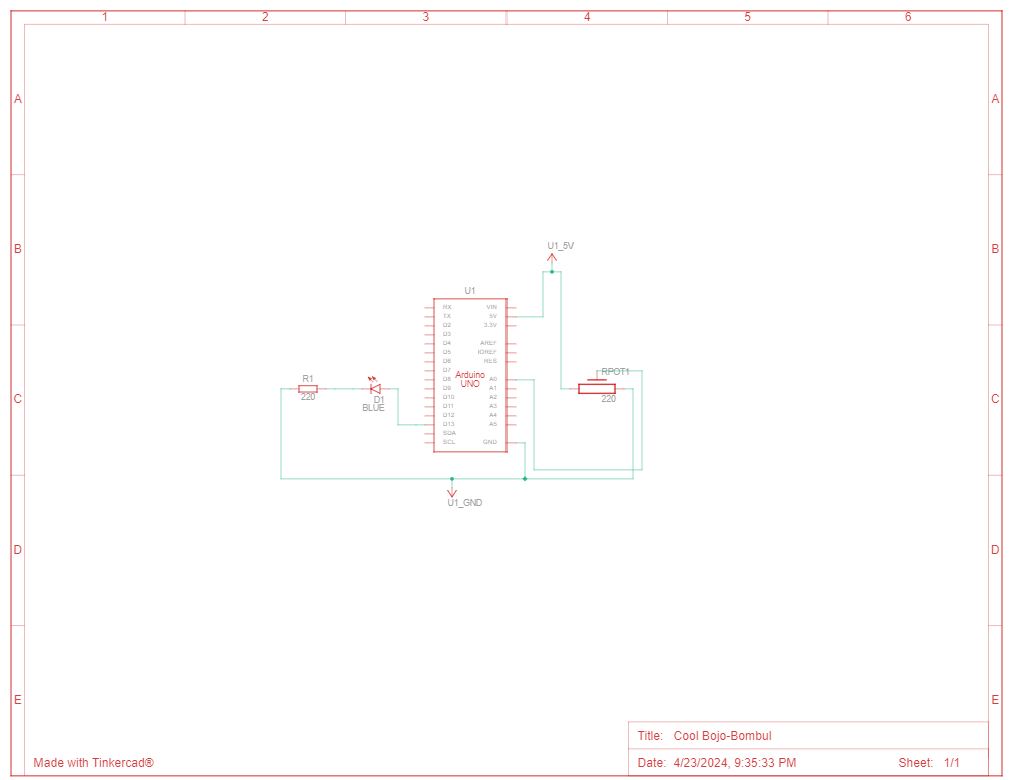
Using a potentiometer
Potentiometer is a variable resistor that allows for manual adjustment of electrical resistance, often used for controlling volume or brightness in electronic devices.
int sensorPin = 0;
int ledPin = 13;
int sensorValue = 0;

void setup()
{
  pinMode(ledPin, OUTPUT);
  Serial.begin(9600);
}

void loop() {
  sensorValue = analogRead(sensorPin);

  digitalWrite(ledPin, HIGH);
  delay(sensorValue);
  digitalWrite(ledPin, LOW);
  delay(sensorValue);

  float voltage = sensorValue * (5.0 / 1023.0);
  Serial.println(voltage);
}

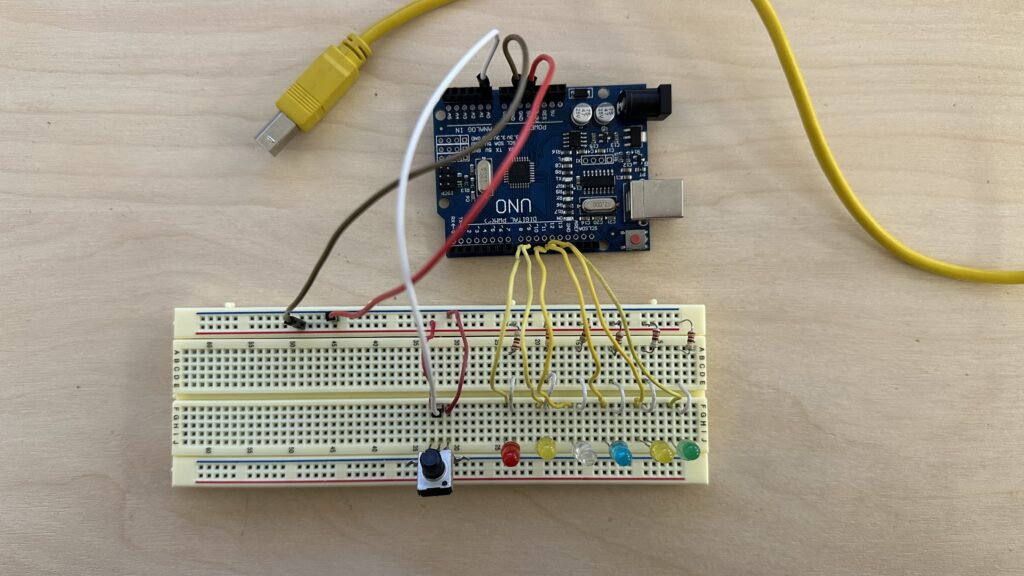
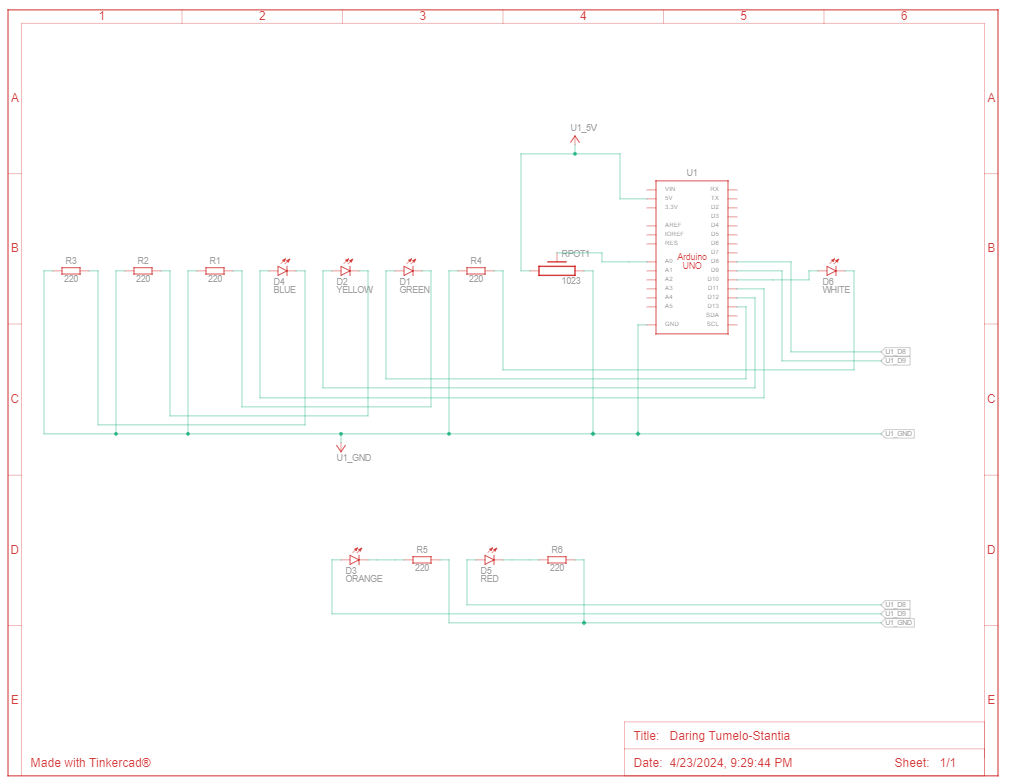
LED Garland
This Arduino code controls a series of LEDs using a potentiometer to select different lighting modes.
int ledPins[] = {13, 12, 11, 10, 9, 8};
int numOfLeds = 6;

void setup()
{
  for (int i = 0; i < numOfLeds; i++) {
    pinMode(ledPins[i], OUTPUT);
  }
}

void loop() {
  int potValue = analogRead(A0);
  int mode = map(potValue, 0, 1023, 1, 6);
  switch (mode) {
    case 1:
      modeOne();
      break;
    case 2:
      modeTwo();
      break;
    case 3:
      modeThree();
      break;
    case 4:
      modeFour();
      break;
    case 5:
      modeFive();
      break;
    case 6:
      modeSix();
      break;
  }
}

void turnAllOff() {
  for (int i = 0; i < numOfLeds; i++) {
    digitalWrite(ledPins[i], LOW);
  }
}

void modeOne() {
  for (int i = 0; i < numOfLeds; i++) {
    turnAllOff();
    digitalWrite(ledPins[i], HIGH);
    delay(500);
    digitalWrite(ledPins[i], LOW);
    delay(500);
  }
}

void modeTwo() {
  turnAllOff();
  for (int i = 0; i < numOfLeds; i++) {
    digitalWrite(ledPins[i], HIGH);
  }
  delay(1000);
  turnAllOff();
  delay(1000);
}

void modeThree() {
  for (int i = 0; i < numOfLeds; i++) {
    for (int brightness = 0; brightness <= 255; brightness++) {
      analogWrite(ledPins[i], brightness);
      delay(10);
    }
  }
  for (int i = 0; i < numOfLeds; i++) {
    for (int brightness = 255; brightness >= 0; brightness--) {
      analogWrite(ledPins[i], brightness);
      delay(10);
    }
  }
}

void modeFour() {
  for (int i = 0; i < 10; i++) {
    turnAllOff();
    delay(250);
    for (int j = 0; j < numOfLeds; j++) {
      digitalWrite(ledPins[j], HIGH);
    }
    delay(250);
  }
  turnAllOff();
}

void modeFive() {
  for (int i = 0; i < numOfLeds; i += 2) {
    digitalWrite(ledPins[i], HIGH);
    if (i + 1 < numOfLeds) {
      digitalWrite(ledPins[i + 1], LOW);
    }
  }
  delay(1000);

  for (int i = 0; i < numOfLeds; i += 2) {
    digitalWrite(ledPins[i], LOW);
    if (i + 1 < numOfLeds) {
      digitalWrite(ledPins[i + 1], HIGH);
    }
  }
  delay(1000);
}

void modeSix() {
  for (int i = 0; i < 20; i++) {
    int randLed = random(0, numOfLeds);
    turnAllOff();
    digitalWrite(ledPins[randLed], HIGH);
    delay(200);
  }
  turnAllOff();
}
Here’s a breakdown of the code:
- Initialization:
ledPins[]: An array containing the pin numbers to which the LEDs are connected.numOfLeds: Number of LEDs connected.
- Setup Function:
- Configures each pin specified in
ledPins[]array as an output pin.
- Configures each pin specified in
- Loop Function:
- Reads the analog value from pin A0, connected to a potentiometer, and maps it to select one of six modes.
- Based on the selected mode, it calls corresponding functions.
- Mode Functions:
turnAllOff(): Turns off all LEDs.modeOne(): Sequentially lights up each LED and then turns it off with a delay.modeTwo(): Simultaneously turns on all LEDs for a brief period and then turns them off.modeThree(): Gradually increases and decreases the brightness of each LED.modeFour(): Alternates between turning all LEDs on and off in quick succession.modeFive(): Alternates between lighting up pairs of adjacent LEDs.modeSix(): Randomly selects LEDs to turn on and off in quick succession.
This code provides a versatile way to control multiple LEDs with various lighting patterns based on the input from a potentiometer